
Introduction
Checking your car’s engine oil is one of the most crucial maintenance tasks every vehicle owner must master. A simple routine check can help you prevent engine damage, reduce wear, and ensure that your vehicle runs smoothly for years. In this guide, you will learn how to check engine oil properly and how to read a dipstick accurately, with practical examples and essential tips.
If you are interested in detailed maintenance, also read our How to Change Engine Oil guide for step-by-step instructions.
Table of Contents
Step 1: Prepare Your Vehicle
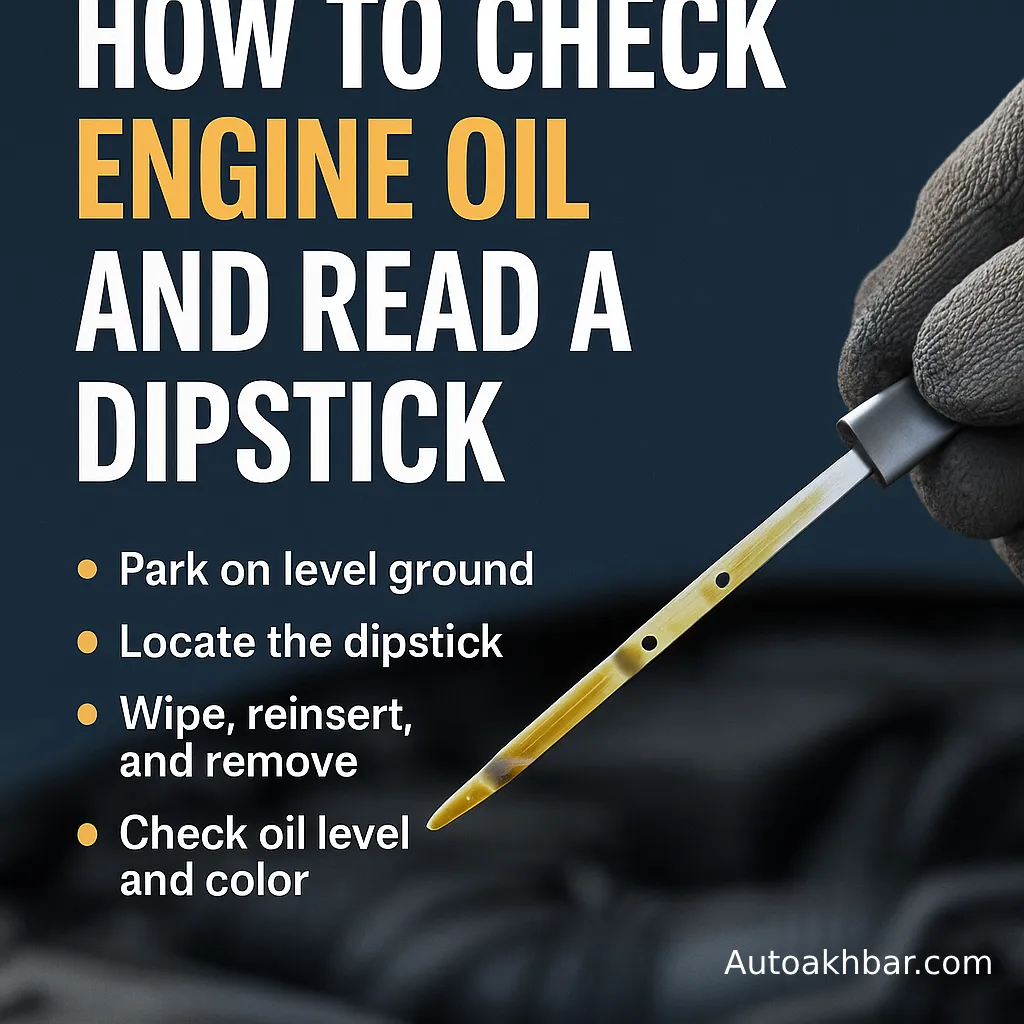
Before checking the oil level, ensure that your car is parked on level ground and the engine is switched off. It is best to wait at least 10–15 minutes after shutting off the engine. This allows the circulating oil to drain back into the oil pan, providing an accurate reading.
For more tips on proper car care, visit Car Maintenance Basics on Cars.com.

Step 2: Locate the Dipstick
Open the bonnet and locate the dipstick. Typically, it has a brightly coloured handle — usually yellow or orange — near the oil fill cap. Some vehicles may have a black dipstick with markings. If you are uncertain, refer to your vehicle’s manual to identify it correctly.
Did you know? Some dipsticks even have oil type information printed on them. Check the handle or the oil cap for recommended oil viscosity (e.g., 5W30).

Step 3: Wipe and Reinsert the Dipstick
Once located, pull out the dipstick completely and wipe it clean with a lint-free cloth. This removes oil splashes that can cause inaccurate readings. Next, fully reinsert the dipstick into its tube and pull it out again to check the actual oil level.

Step 4: Read the Dipstick Markings
A standard dipstick has two marks:
- Low Mark: Indicates the minimum safe oil level.
- Full Mark: Indicates the maximum safe oil level.
The space between these marks usually equals about one quart (approximately 1 litre) of oil. If the oil level is below the low mark, you must add oil immediately. If it is between the low and full mark, you are within a safe range, but topping up closer to full is recommended.
Tip: Some cars have different dipstick styles: crosshatched areas, dots, or plastic cut-outs. The logic remains the same — check that the oil level sits within the acceptable range.

Step 5: Inspect Oil Condition
The oil’s colour tells a lot about its health:
- Golden Brown: Normal, clean oil.
- Dark Brown or Black: Indicates old, dirty oil — time for an oil change.
- Milky or Frothy: Could suggest coolant mixing with oil — consult a mechanic immediately.
To learn more about oil quality and when to change it, read our in-depth guide: When to Change Engine Oil.

Step 6: Add or Remove Oil if Needed
- If oil is low, add the recommended oil type gradually and re-check the level.
- If oil is overfilled, it is advisable to drain some oil as excess oil can cause crankcase pressure issues, leaks, and even engine misfires.

External Reference:
For professional advice, you can also refer to Mobil™ Oil Checking Tips for additional guidance on oil maintenance.
Conclusion
In conclusion, regularly checking your engine oil and understanding how to read the dipstick accurately is an essential practice for every responsible vehicle owner. This simple routine ensures that your engine remains properly lubricated, operates efficiently, and avoids unnecessary wear and damage. By following these steps diligently, you can extend your car’s life, maintain peak performance, and save on costly repairs. Prioritise this small habit — your engine will thank you in the long run. For more expert tips, always stay connected with autoakhbar.com.
For more expert automotive guides, visit autoakhbar.com and stay updated with trusted car maintenance tips.

